In order to use our plugin for WooCommerce, you should install it and configure it.
Plugin installation
Plugin configuration
Checkout display order
Going further
Plugin installation
1. Go to the "Plugins" menu of your WordPress back-office.
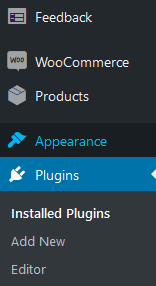
Step 1
2. Click on the "Add New" button at the top of the page, just beside "Plugins".

Step 2
3. Type the keyword "payplug" in the field "Search plugins".

Step 3
4. You should pick up the plugin "PayPlug for WooCommerce (Official)" by "PayPlug".
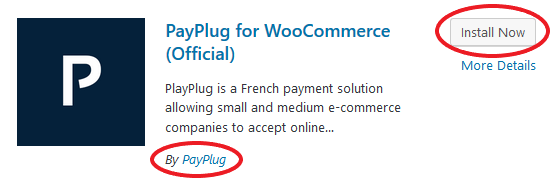
Steps 4 and 5
5. Click on "Install Now".
6. Click on "Activate".
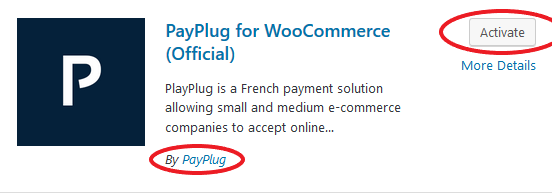
Step 6
7. The PayPlug plugin is now installed and activated.
You are directed to the Plugins' page of your back-office.
You can go forward with the "Configuration" section.
Plugin configuration
1. Once the plugin is activated, the configuration starts from the "Plugins" page.
2. Find the field related to the PayPlug plugin and click on "Settings".
3. Use your PayPlug's email and password to connect the plugin.
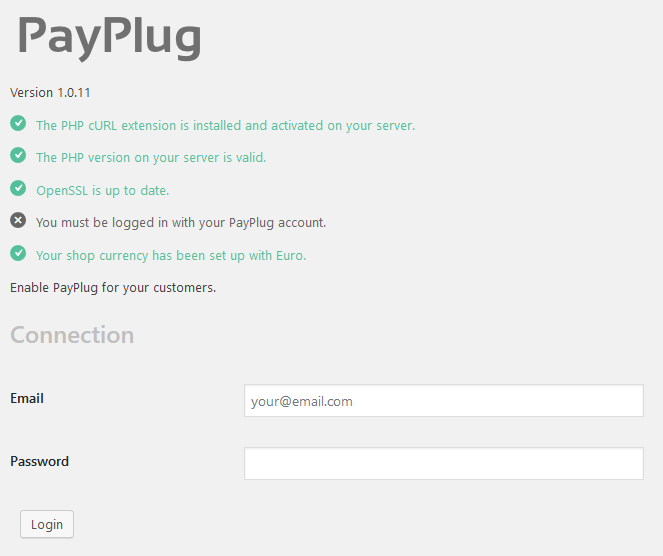
Step 3
4. Once the plugin is connected, choose the Test mode if you want to try the solution with a test card or the Live mode if you want to receive real payments.
5. Choose the "Redirect" page if you want your customers pay on a payment page hosted at secure.payplug.com.
Choose "Integrated" if you want your customers pay through a Lightbox while staying on your site.
We recommend the activation of the Debug mode.
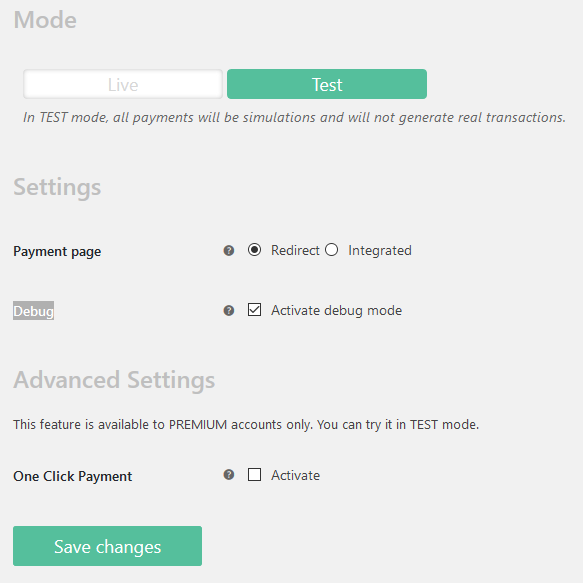
Steps 4, 5 and 6
6. Click on "Save changes" whenever you modify your configuration.
Checkout display order
Once the plugin is installed and configured, you may set it to the first position in your checkout.
1. Go to the menu "WooCommerce", then to "Settings", then to the tab "Payments".
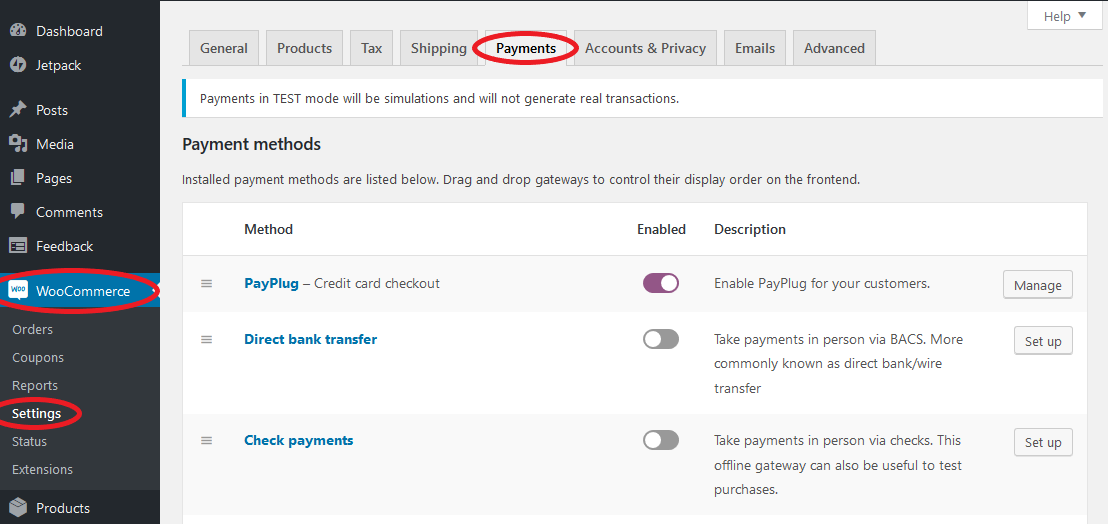
2. With the help of your mouse, drag and drop the PayPlug field to slide it to the first position.
Save the modification.
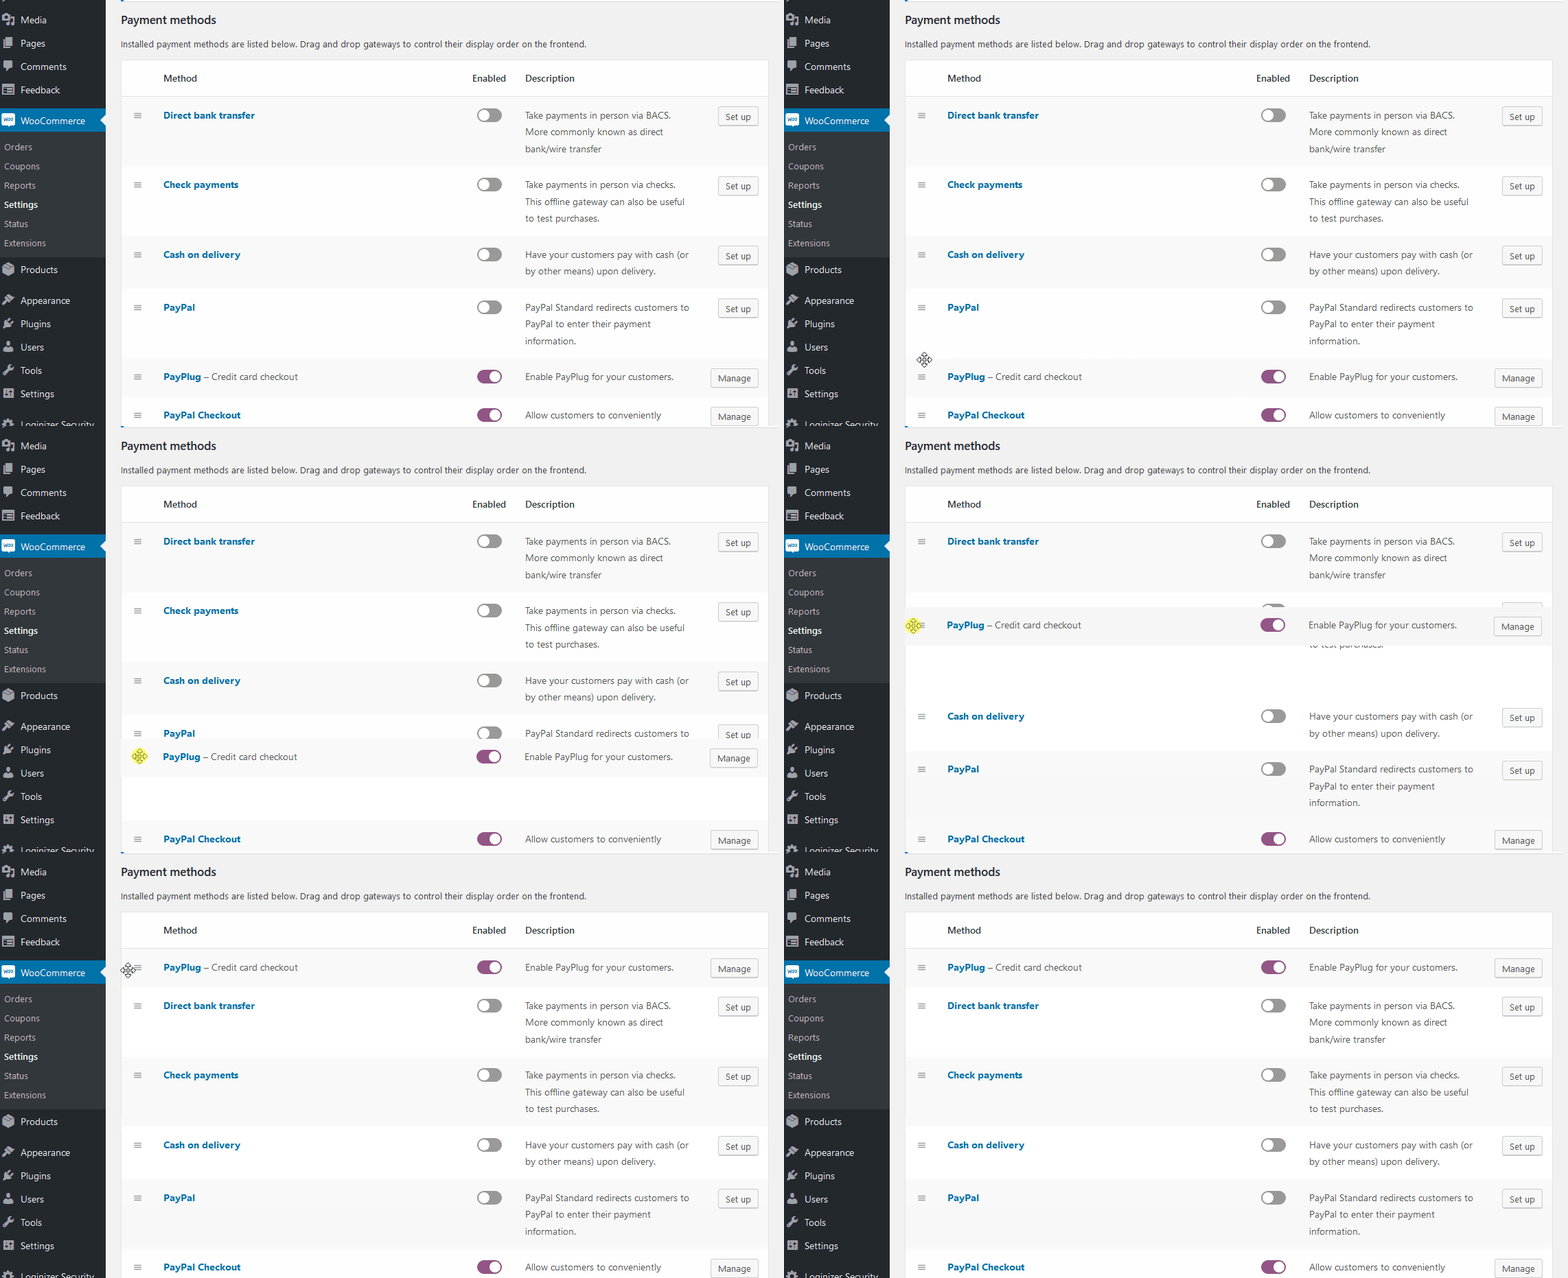 Step 2
This tutorial was made with version 3.4.7 of WooCommerce in October 2018.
If you are using an older version, the menus may be slightly different.
Going further
How do I test the service ? What is Test mode ?
How do I customize my payment page ?